Printing Your Shipping Labels
Once you’ve booked a shipment through our platform, your shipping labels will be generated and made available for download and printing. Here’s everything you need to know about viewing and printing your labels:
Key Topics:
- Customise Your Printer Settings
- Printing Single Labels or in Bulk
- Downloading a PDF and Printing Manually
- Automating Label Printing
- Printing Australia Post Branded Labels
- Accessing Your Labels After Booking
1. Customise Your Printer Settings
You can configure your label printing settings directly within your Interparcel account. Follow these steps:
- Log in to your Interparcel account. Hover over My Account and select Settings. Click Printer & Scaner from the left-hand menu.
Here’s what you can customise:

Interparcel Print Manager™
- Enable Printer Plugin: Use this plugin to enable our Print Manager feature. Learn how to install it here.
Label Settings
- Shipping Label Format: Select your preferred format:
- 6x4 Thermal Labels
- A4 Standard
- A4 (4 Labels Per Page)
- Hide Sender Address: Some couriers allow hiding the sender’s address. Contact us for compatible services.
- Automatic Label Printing: Enable this option to print the label automatically when you click Book to process an order.
Scaner
- Scanner Mode: If you print packing lists from the Shipping Manager, you can scan them to speed up processing. Use this setting to choose what happens when you scan a packing list, either open the order on your screen or book the shipment immediately.
2. Printing Single Labels or in Bulk
Single Labels: Printing a Label for One Order. If you need to print a shipping label for a single order, you have several options:
- Immediately After Booking (Excluding Australia Post Labels): If you book an order with one of Interparcel’s courier partners, your label will be available on the booking confirmation page right after payment. Please note, this option is not available for Australia Post labels.
- Via Order Confirmation Emails (Excluding Australia Post Labels): You will receive an email for each processed order, which includes the shipping label. Please note, this option is not available for Australia Post labels.
- Printing via Shipping Manager: If you need to access a single label after leaving the booking confirmation page, you can access all labels booked that day within the Shipping Manager's Booked Orders tab. This method can be used to also print your Australia Post labels. Tick the relevant order you wish to print labelling for, and select Print Label at the top of your order list.
- Via Your My Orders Section: If you need to access a single label, this can be done via your My Orders section of your Interparcel account. Hover over My Account tab from the top menu, and select My Orders. Search for the order, and click on the listing to enter the specific order details. Labels for that order will be available at the bottom of the order details page. Labels will remain available for a two week period after booking. This method can also be used for Australia Post labels.


Bulk Labels: Printing Labels for Multiple Orders. If you need to print multiple labels at once, you have several options:
- Immediately After Booking (Excluding Australia Post Labels): When processing multiple orders at once, your labels will be available on the booking confirmation page right after payment. You can use this file to print labels in bulk. Please note, this option is not available for Australia Post labels.
- Printing via Shipping Manager: If you need to access multiple labels after leaving the booking confirmation page, or you have processed single orders over the day and want to print all labels that have been booked that day at once, you can access all labels booked that day within the Shipping Manager's Booked Orders tab. This method can be used to also print your Australia Post labels. You can tick all relevant orders that you would like to print labelling for, and select Print Label at the top of your order list.
- Via Bulk Order Confirmation Email (Excluding Australia Post Labels): When you process multiple orders at once, you will also receive an email containing all of the labels included in that transaction, and this file can also be used to bulk print your labelling for these orders. Please note, this option is not available for Australia Post labels.


3. Downloading a PDF and Printing Manually
After completing your booking, you’ll be taken to a page where your order documents can be downloaded. You’ll also receive an email with all your shipment labels and documents. To print your label:
- Download the Shipping Label PDF and any required documents.
- Open the PDF. Ensure Adobe Reader is installed. Click the print icon in the top-right corner.
- Select your printer and click Properties.
- Choose your desired paper size (A4 or 4x6).
- Click Print.


Your labels are now ready to attach to your parcel!
4. Automating Label Printing
Save even more time with Interparcel Print Manager, which lets you print labels instantly without downloading PDFs. With just one click, you can:
- Simplify bulk printing.
- Print all required shipping labels and documents, no PDFs needed.
Learn how to install Interparcel Print Manager here.
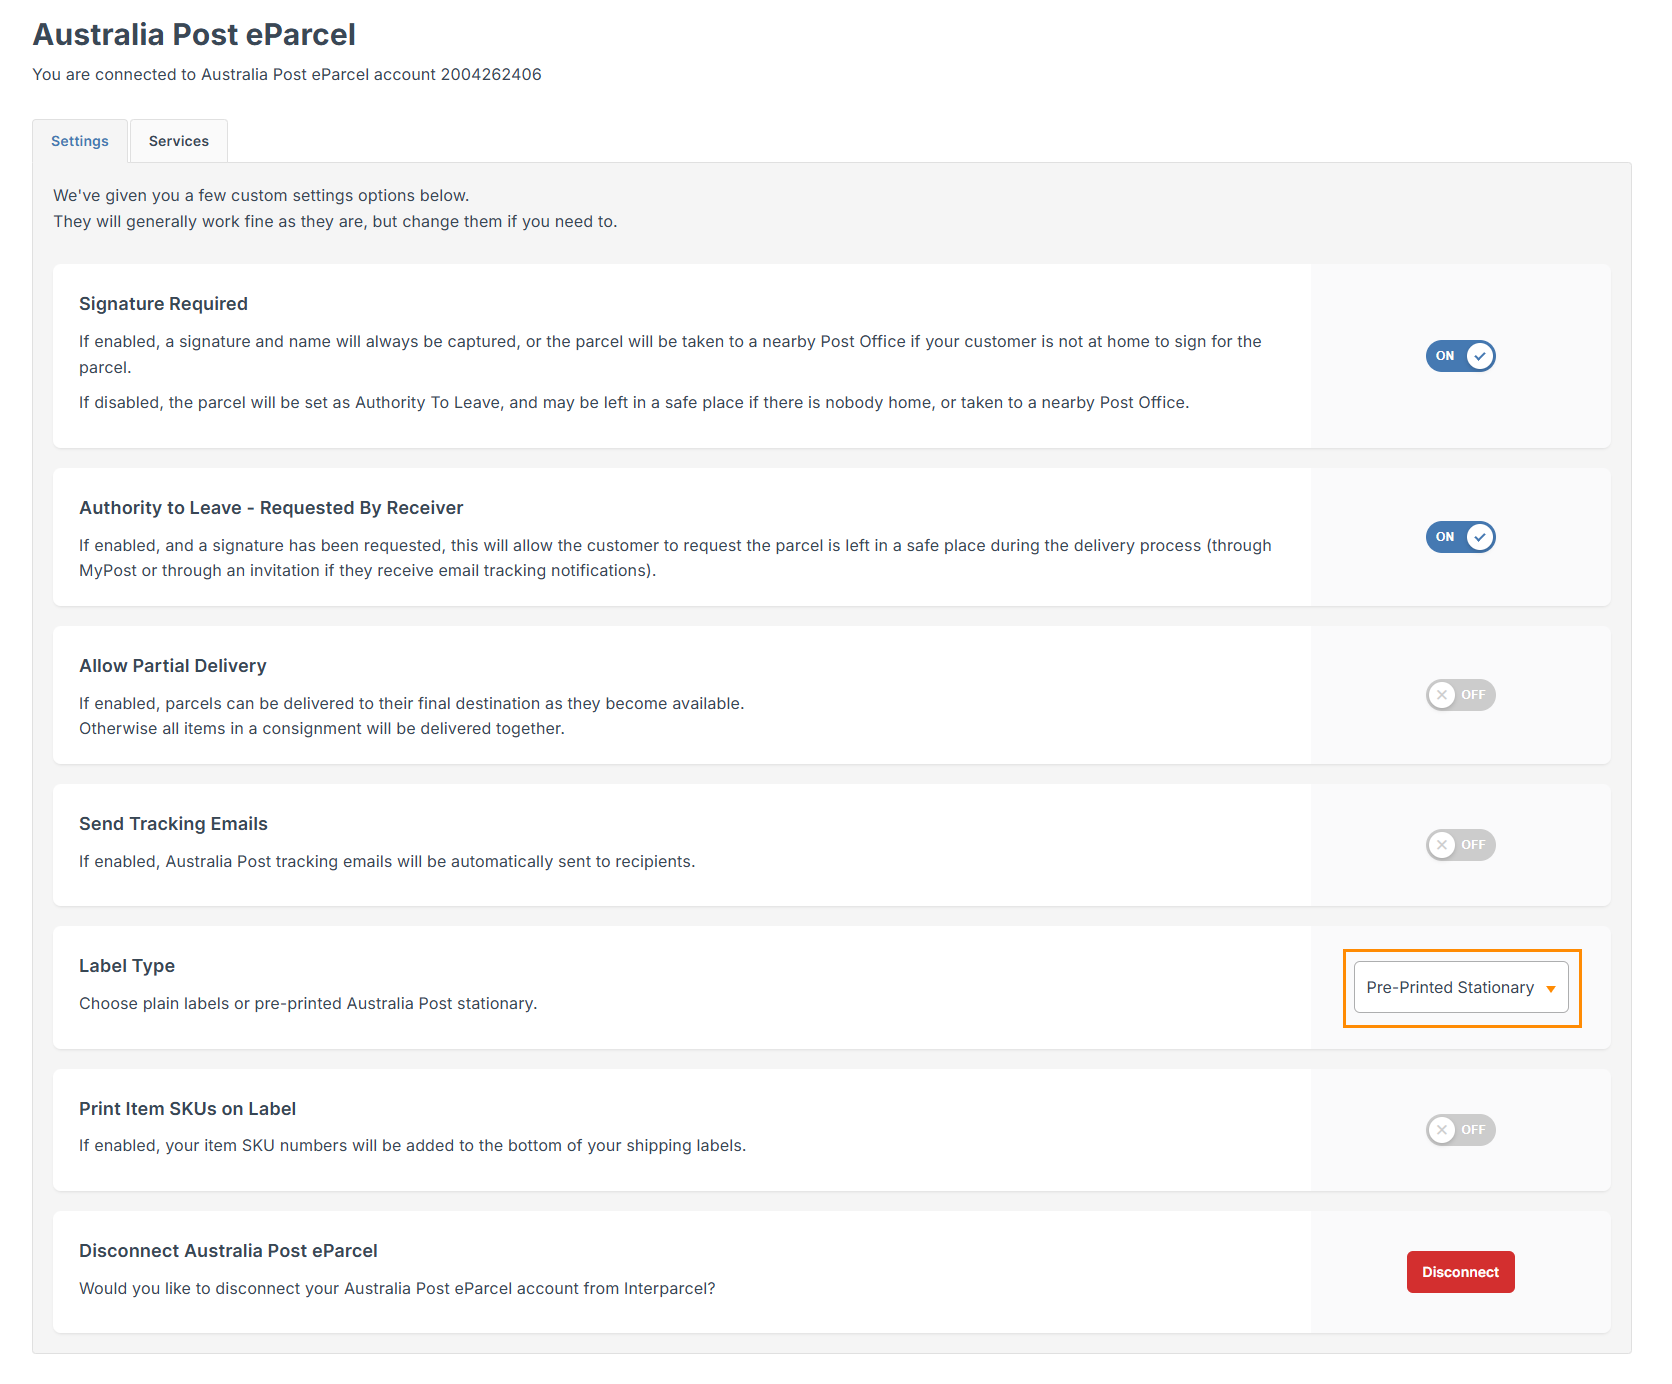
5. Printing Australia Post Branded Labels
For Australia Post shipments, choose between plain or branded labels featuring the Australia Post logo.
Note: Available only for Parcel Contract (eParcel) accounts, not MyPost Business.
- Ensure your Australia Post account is connected. Log in to your Interparcel account. Hover over Shipping Tools, select My Couriers, and click Courier Connections. Click Manage next to your eParcel connection.
- Under Label Type, select:
- Plain Labels for unbranded labels.
- Pre-printed Stationery for Australia Post branding.


6. Accessing Your Labels After Booking
Need to reprint or view your labels? Follow these steps:
- Log in to your Interparcel account. Hover over My Account and select My Orders.
- Locate the order and scroll to the Documents section. View or print your labels and other documents.

Note: Labels will remain available for a two week period after booking.
With these steps, printing your shipping labels is streamlined and hassle-free, giving you more time to focus on growing your business.
Other Relevant Guides
- Set up Print Manager
- Set up Branded Tracking
- Automate Your Shipping With the Interparcel Rule Manager