Shopify Settings
Here's a detailed explanation of how you can customise your Shopify integration settings to ensure that your shipping process with our Shipping Manager is both efficient and perfectly aligned with your specific needs.
Set up Your Settings For Your Shopify Store
Follow these steps to change the settings for your Shopify integration:
- Hover over the Shipping Tools tab, select eCom Platforms and click Shopify. Click the Manage button next to the Shopify icon.
- In the Settings tab, you will be able to enable and disable the following features:
- Automatic Order Import: Enable this option to import new orders to your Interparcel account within seconds of them being received. The orders will automatically appear in the Shipping Manager section of your account in real time.
- Import orders for all couriers: Enable this option if you want to import all orders into your Interparcel account, regardless of the courier service that your customer picked.
- Order / Product Tags to Ignore: Type a tag to ignore any orders or products containing that tag when importing orders.
- Bin Location: A bin location in a warehouse refers to a designated place where inventory is stored. It's a label used to identify the exact spot of an item within the warehouse.To enable Bin Location support in Shopify, create a new custom text metafield in Shopify with the name 'bin_location' and ensure you enter a value for each product's bin_location. After creating the metafield in Shopify, enable Bin Location in your Interparcel Packing List settings. For more details on how to create a metafield in Shopify click here.
- Auto dispatch orders in Shopify: Enable this option to automatically mark orders as fulfilled and update tracking information in Shopify once your orders are booked through Interparcel.
- If you're not intending to provide live shipping quotes at your store checkout, and instead utilise flat rate or free shipping, you're now set up to start processing your orders. You can use the Shipping Manager Guide to assist you in importing your orders into your Interparcel account and fulfilling them.
- In the Cart Quoting tab, you will be able to enable and disable the following features to display live shipping rates at checkout:
- Enable Live Shipping Rates: Enable this option to display live quoting at checkout. See how to set up your Interparcel account and Shopify store to activate live shipping rates for your checkout here.
- Same Day Despatch Cut Off Time: Set the latest time you despatch orders. This time won't be shown at checkout, it's used by Interparcel to calculate the transit time estimates. This feature will work only if you enable the Display Transit Time option.
- Handling Charge: You can add an additional handling charge to your shipping rates to cover packaging and handling costs. This can be indicated as a fixed amount or a percentage, such as 3.95 or 3%.
- Display Transit Time: Enable this option to display delivery estimated time at checkout.
- In the Cart Services tab, you can toggle on and off the courier services you would like to display at checkout. You can also type the Display Name to make it more user-friendly. If you select two standard services and use the same display name, only the cheapest will appear at checkout.
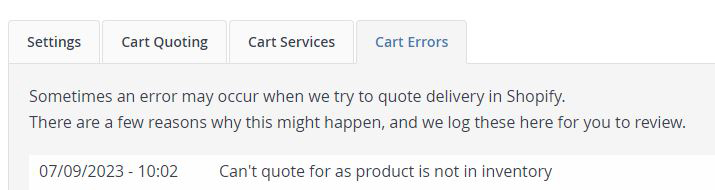
- The Cart Errors tab will give you a timestamped error if live quoting shipping costs didn't work at your checkout, and will normally indicate why this occurred. This tab will be blank if there weren't any errors at your checkout or If you didn't Enable Live Shipping Rates.
- Note that to set up for live rates at your Shopify checkout, you will need to follow an additional guide. See how to set up your Interparcel account and Shopify store to activate live shipping rates for your checkout here.


Other Relevant Guides
- Send Your Orders Through the Shipping Manager
- Send International Orders
- Activate Live Shipping Rates At Checkout
Didn't Find What You're Looking For?
If you have any questions or concerns regarding your integration or questions about how to send your order simply email us at shippingtools@interparcel.com.au, and we'll provide the assistance you need.