Activate Live Shipping Rates At Checkout
Live shipping rates allow you to let customers decide what courier and costing they prefer for their delivery. Once activated, your customers will see a list of different couriers at checkout with live shipping rates. This empowers your customers with real-time delivery choices, enhancing transparency and satisfaction while reducing cart abandonment.
To activate live shipping rates, you will need to connect your WooCommerce Store to our platform.
If you've already completed the integration, follow these four easy steps:
- Download And Install The Plugin
- Select A Zone And Enter Our Auth Key
- Upload Product Measurements and Weight
- Activate Cart Services
Step 1: Download And Install The Plugin
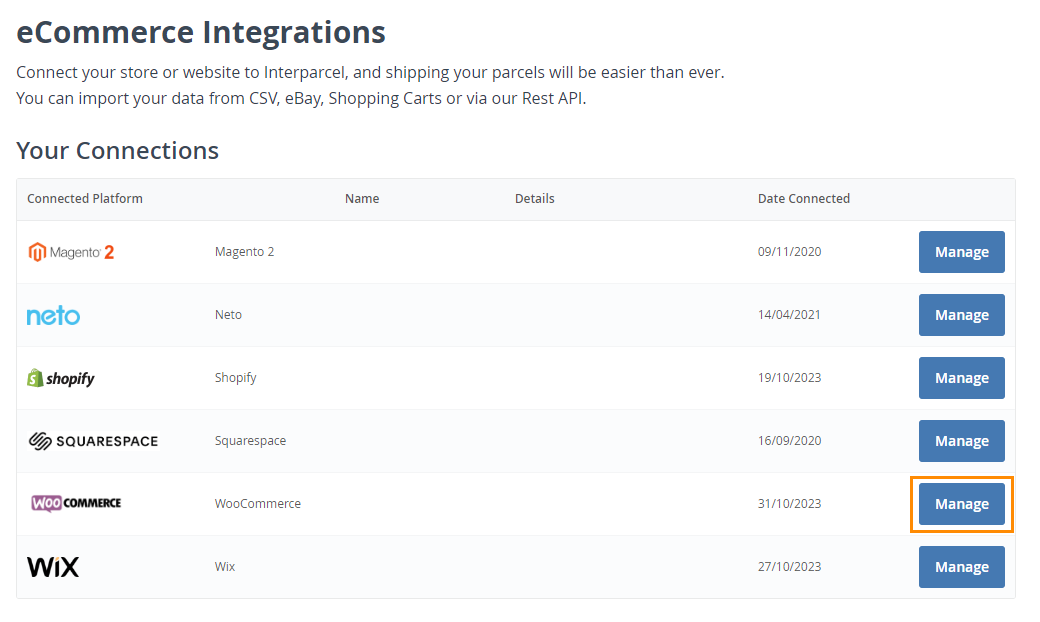
- To download the plugin, you will need to log in to your Interparcel account, hover over the Shipping Tools tab, select eCom Platforms and click WooCommerce. Click on the Manage button next to your WooCommerce connection to go to your WooCommerce Settings.
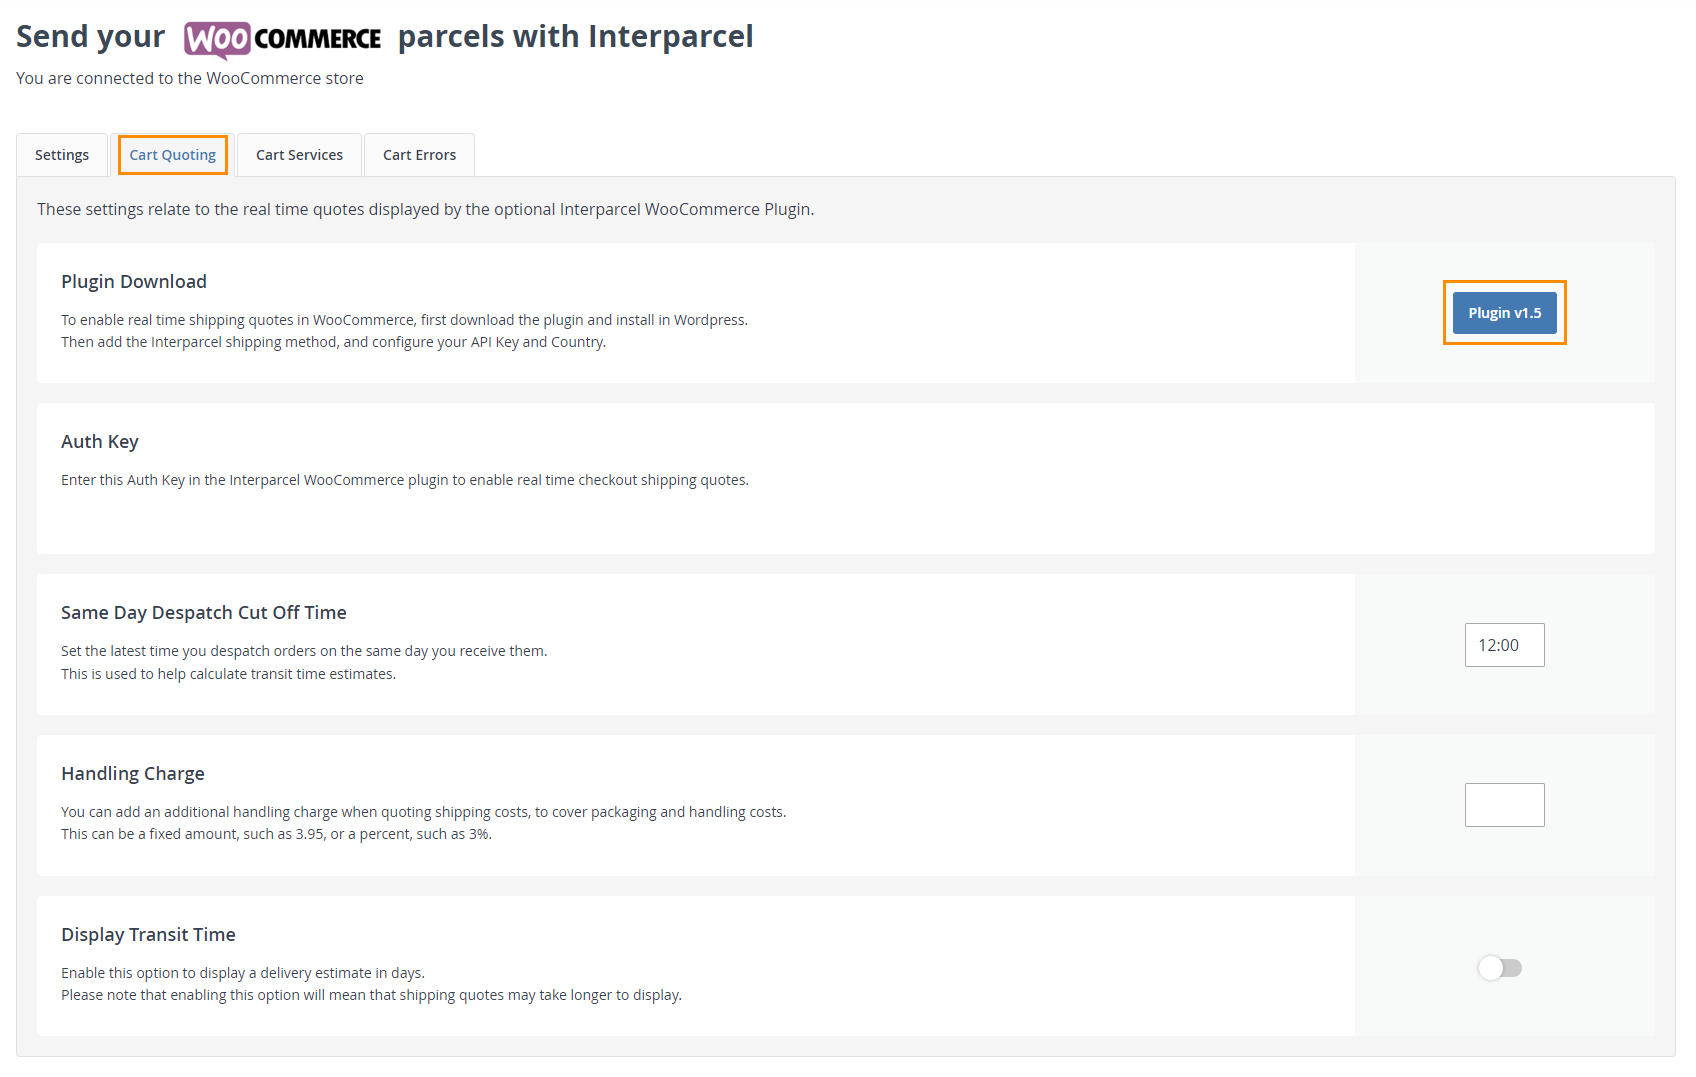
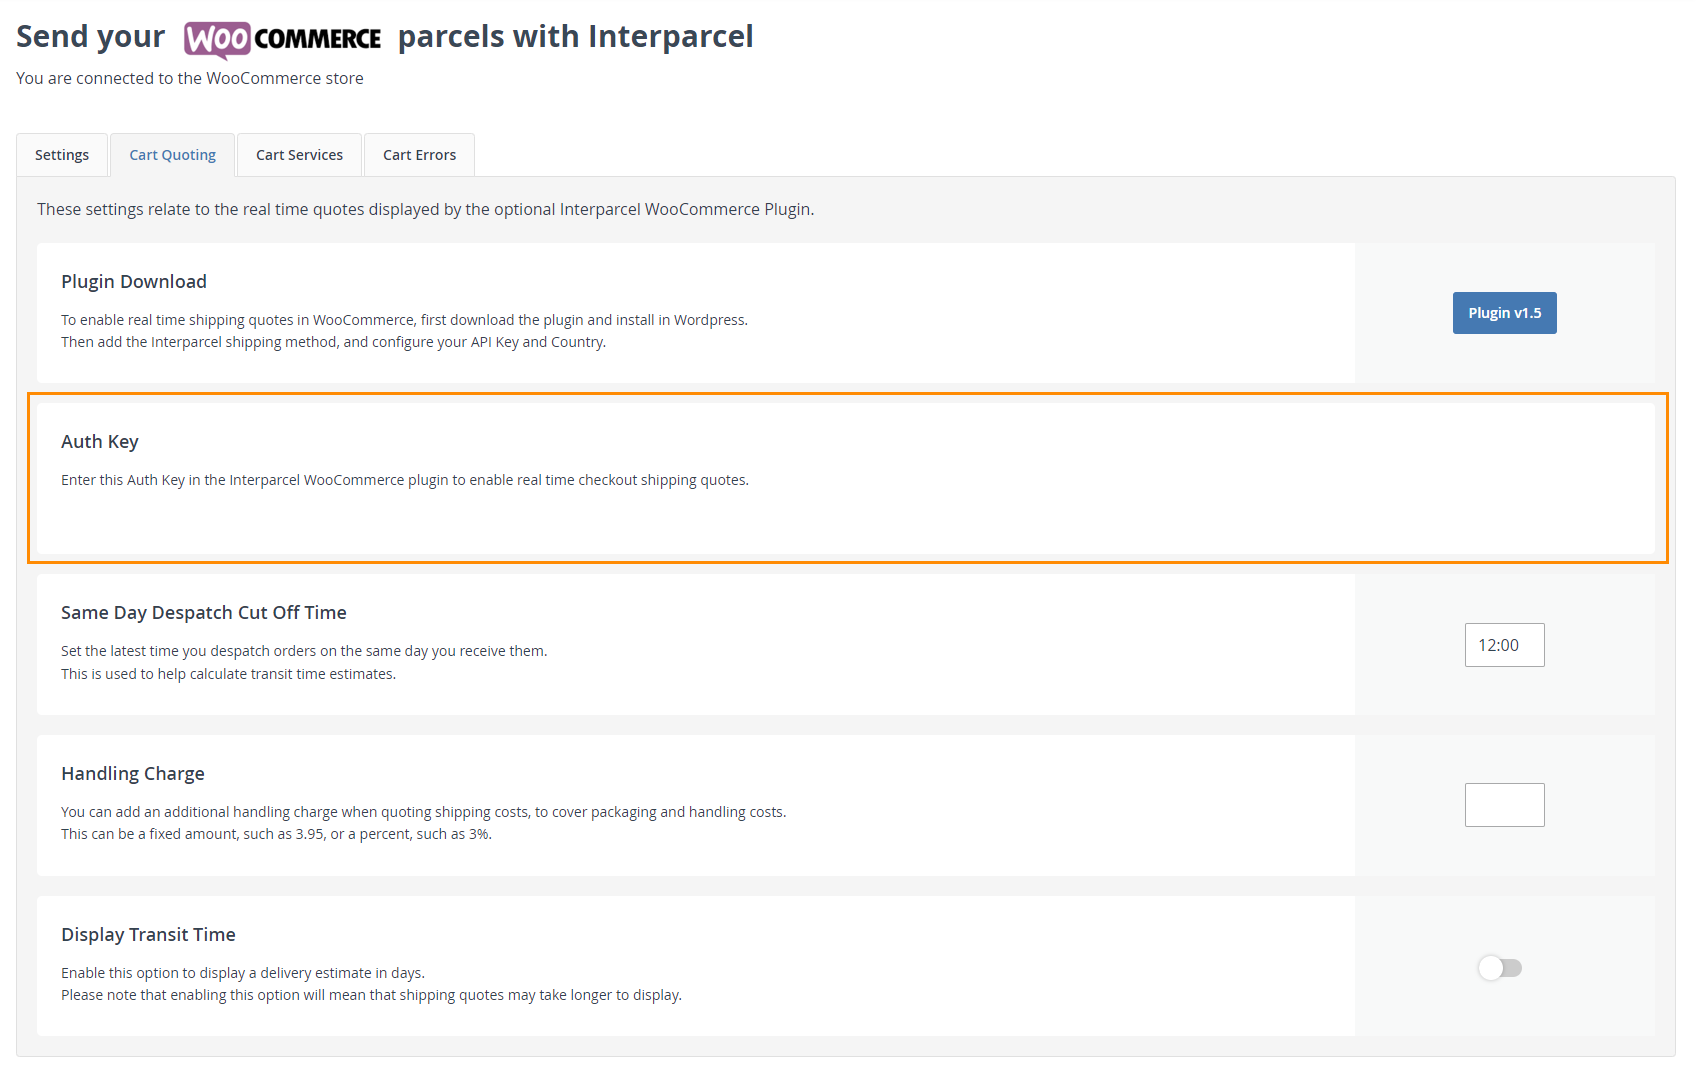
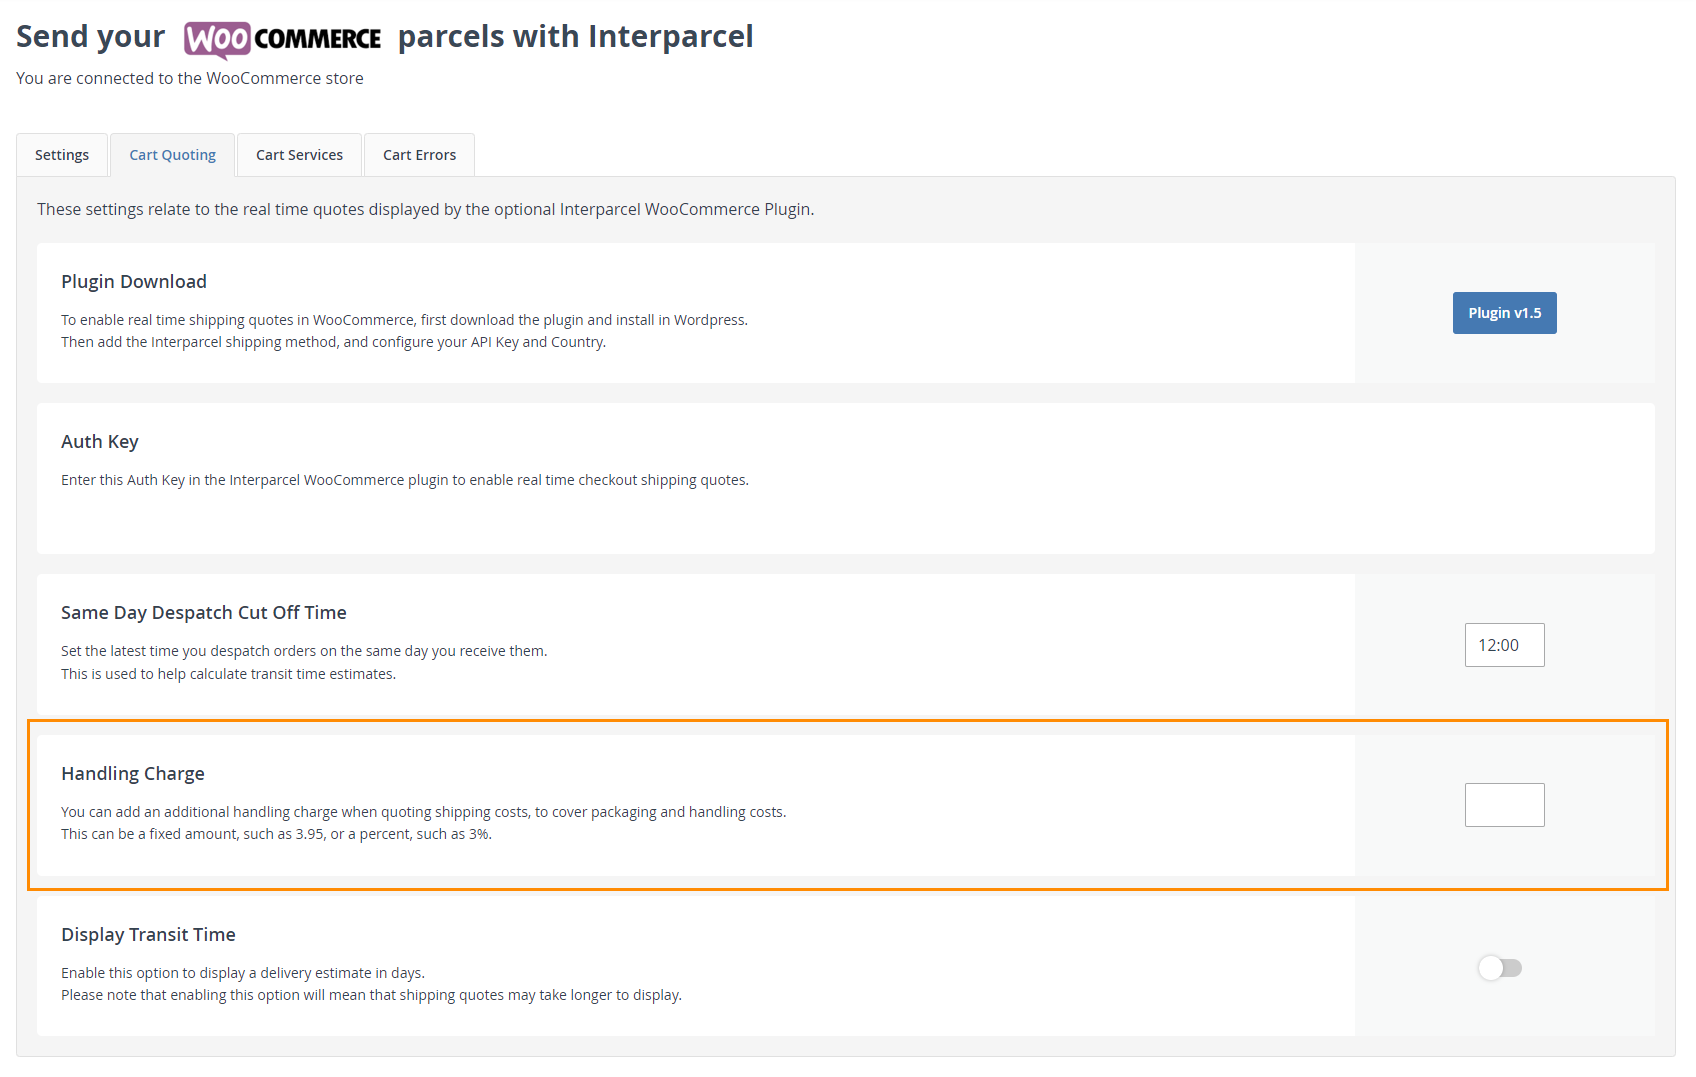
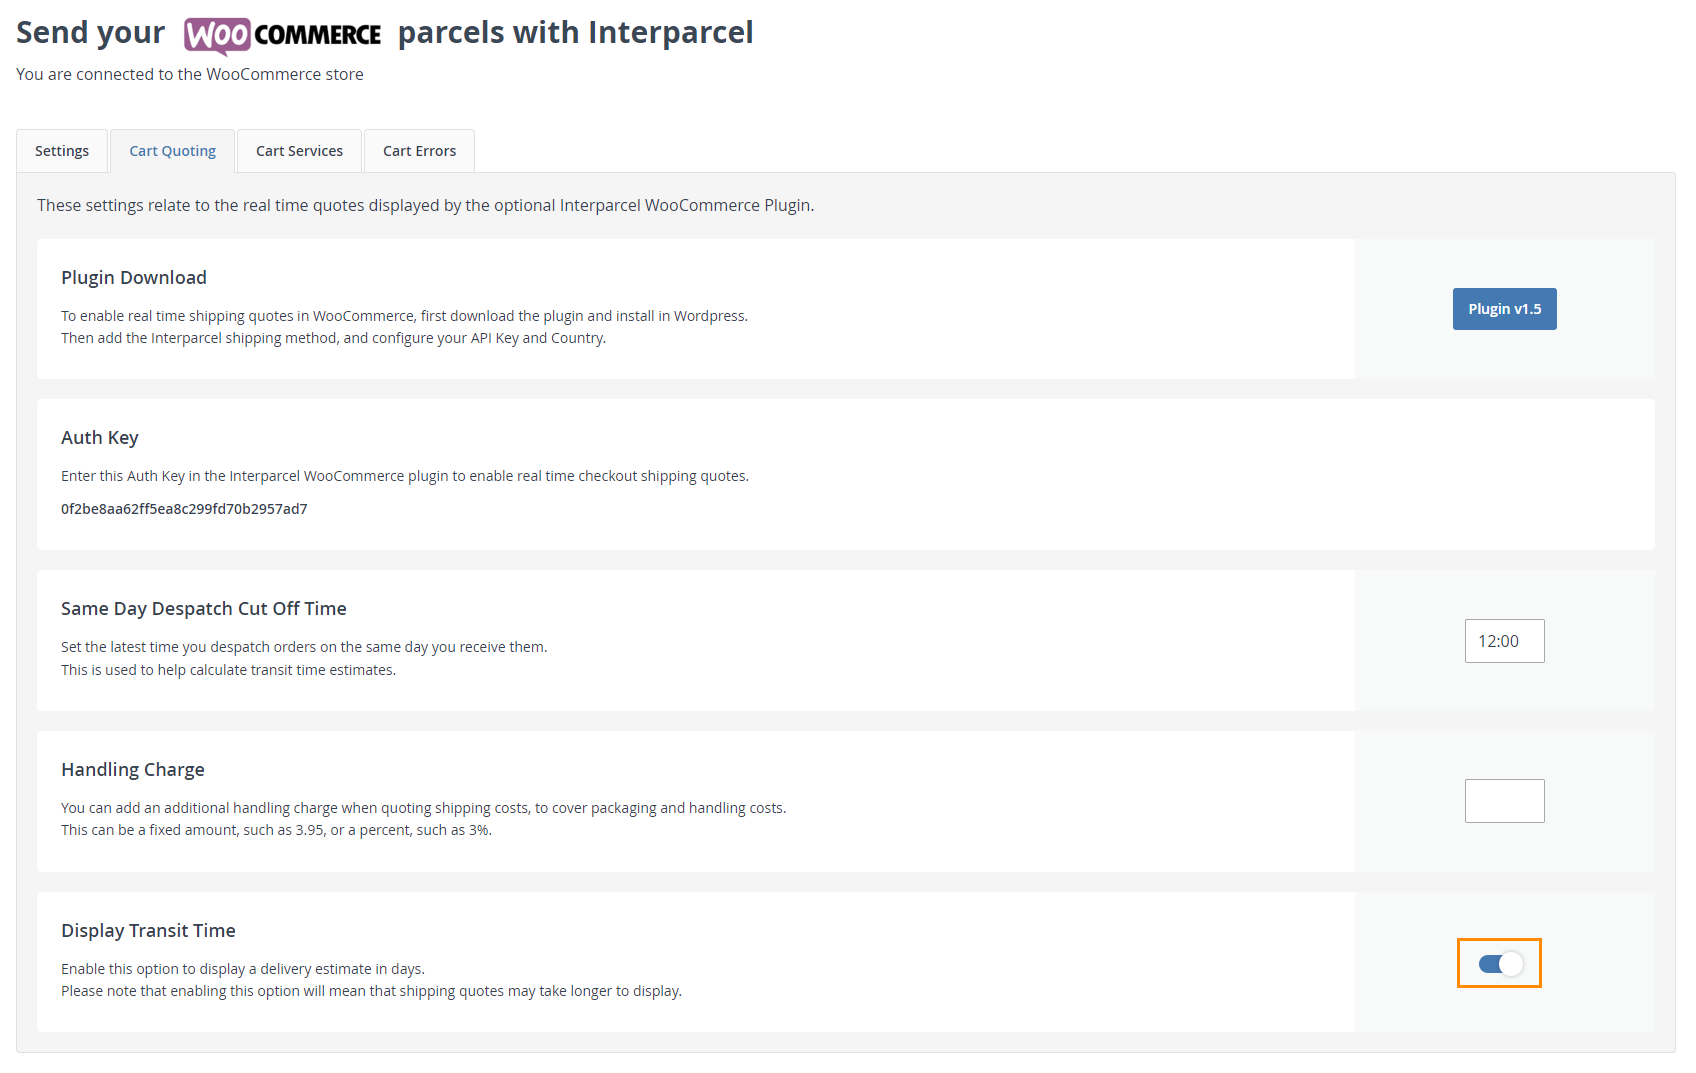
- Select the Cart Quoting tab and download the plugin by clicking Plugin v1.5.
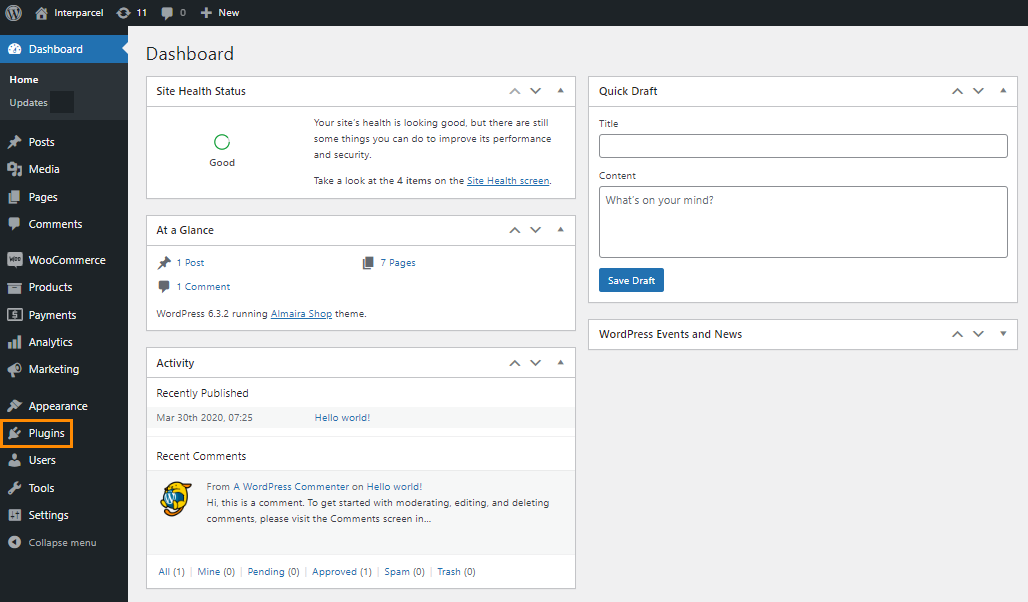
- To Install the plugin, log in to your WordPress account and select Plugins.
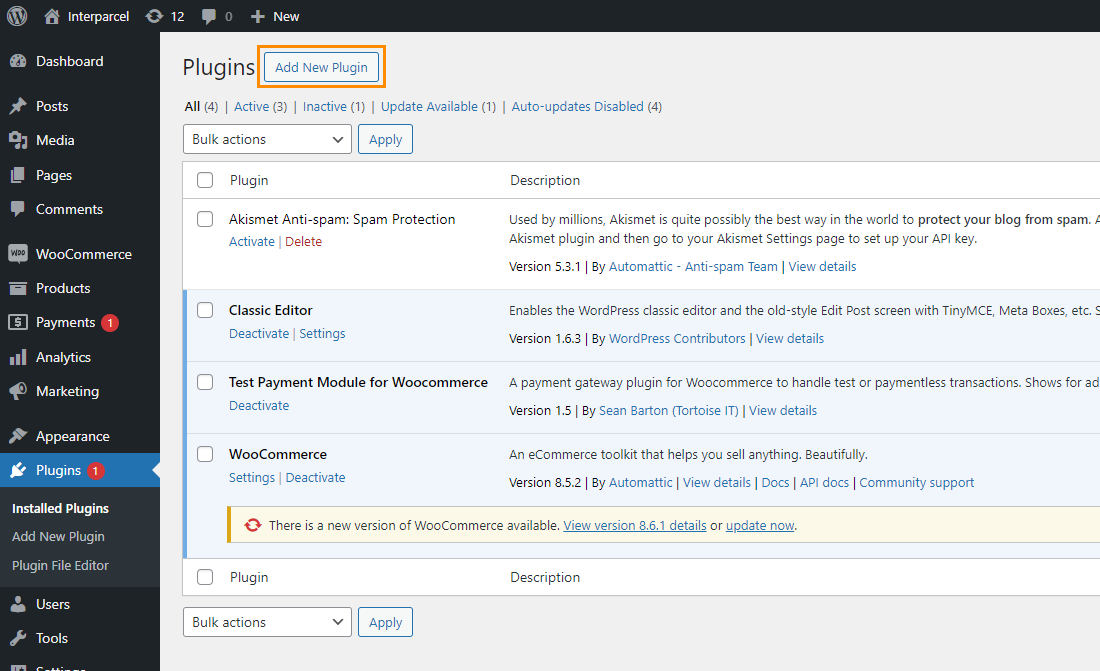
- Click Add New Plugin.
- Click Upload Plugin
- Upload the plugin that you downloaded from the Interparcel dashboard.
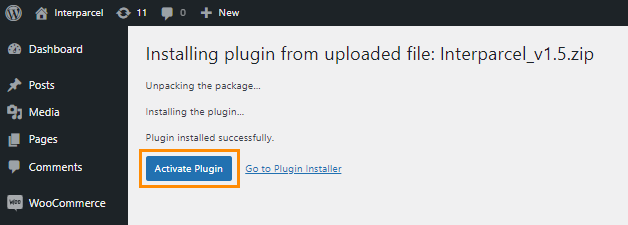
- Click Install Now.
- Click Activate Plugin.


Step 2: Select A Zone And Enter Our Auth Key
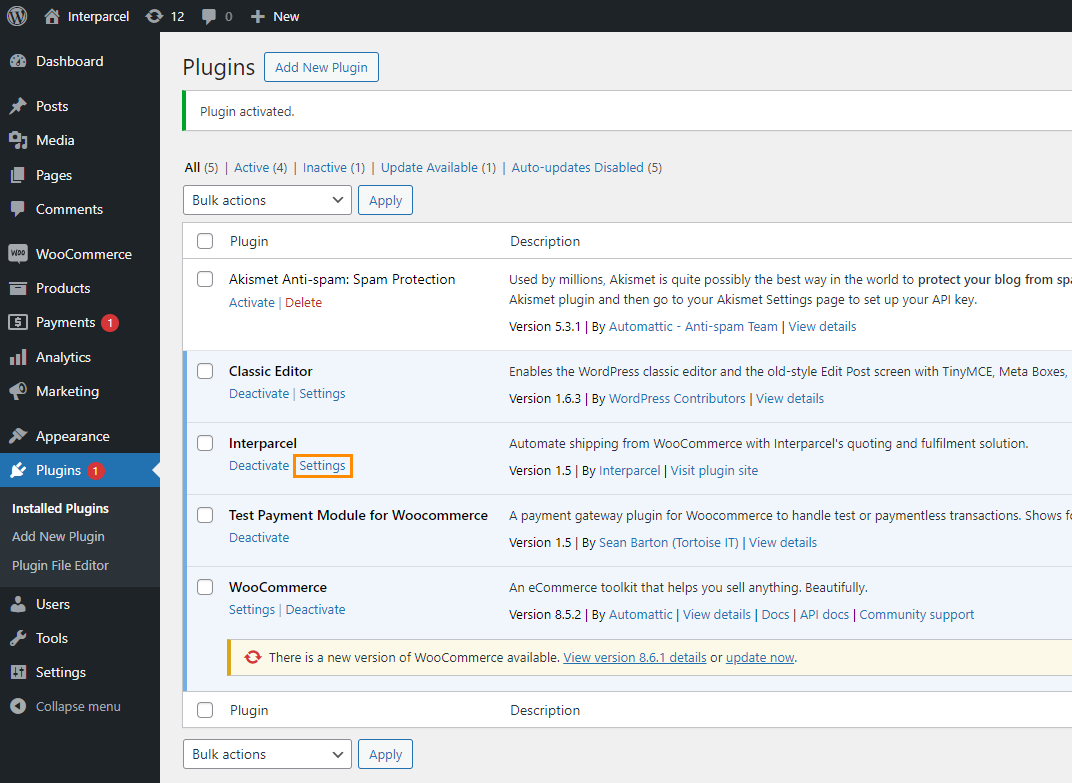
- To select a zone, go back to your WooCommerce dashboard, select Plugins and click on Settings below the Interparcel plugin.
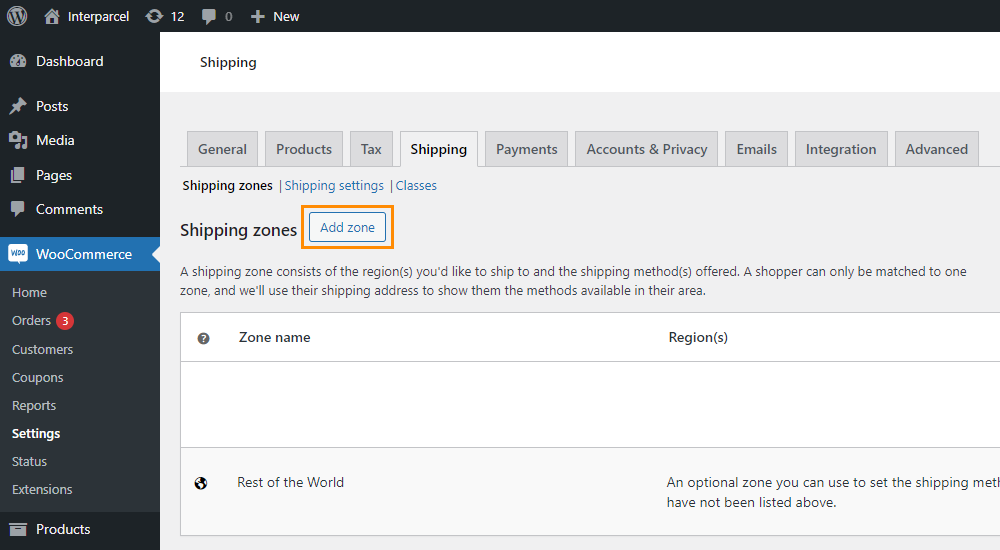
- Click Add Zone.
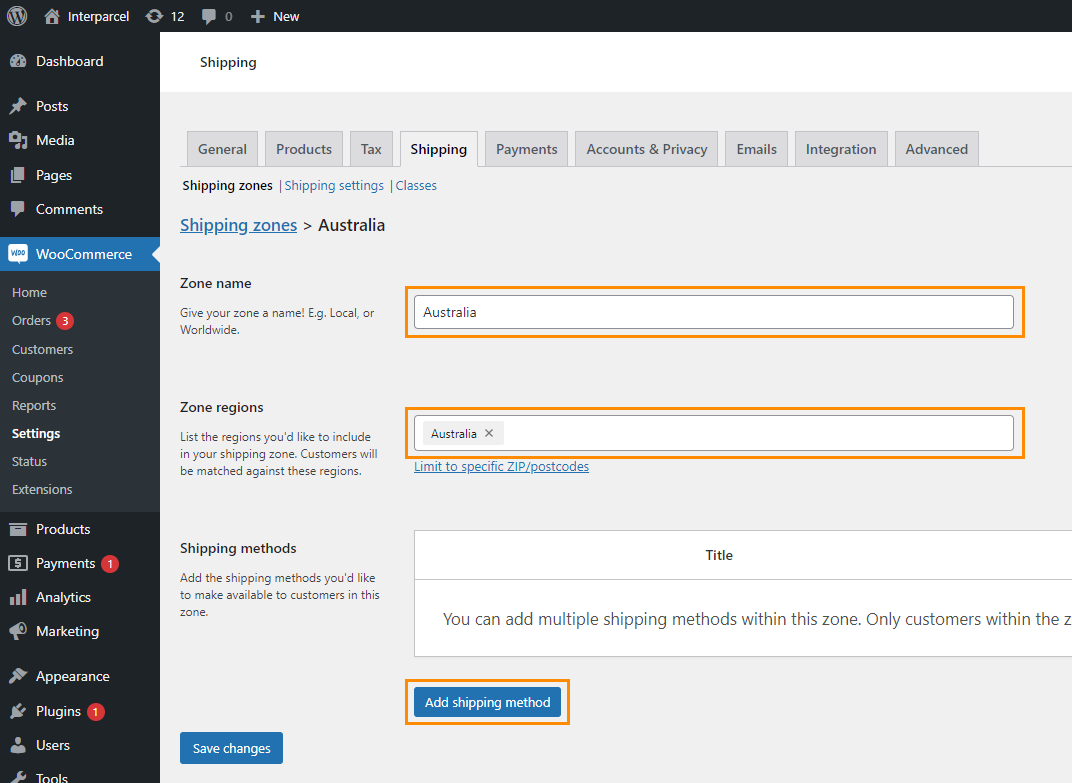
- Name the shipping zone, select 'Australia' as your Zone region and click Add shipping method.
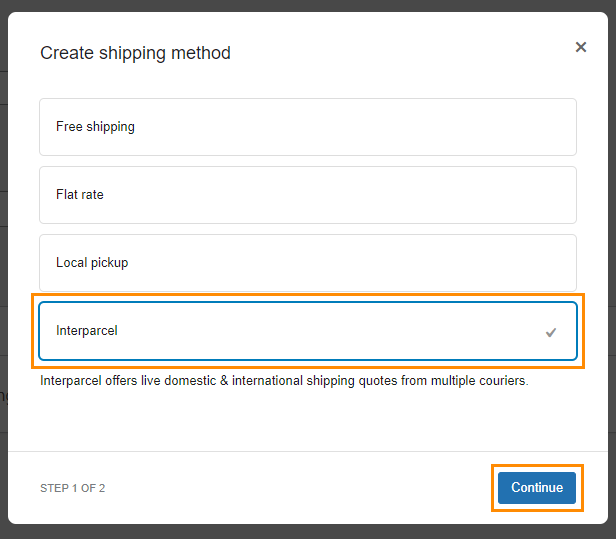
- Select Interparcel and click Continue.
- You will find our auth key within your Interparcel account WooCommerce Settings under the Cart Quoting tab.
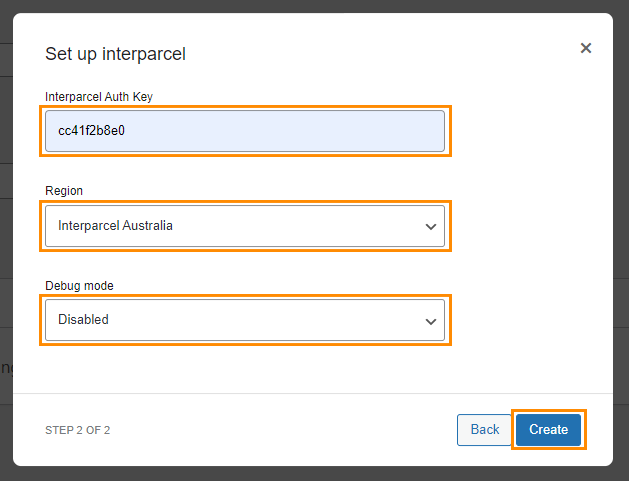
- Paste it in Interparcel Auth Key, select 'Interparcel Australia' as your Region and leave the Debug mode as 'Disabled'. The debug mode provides detailed information about the application's operations, helping developers and IT professionals diagnose problems, understand application behavior, and improve performance. If there is any issue with the WooCommerce plugin, our developers can use this debug mode to assist in diagnosing the issue for you. Click Create.
- The shipping zone has been created!
Step 3: Upload Product Measurements and Weight
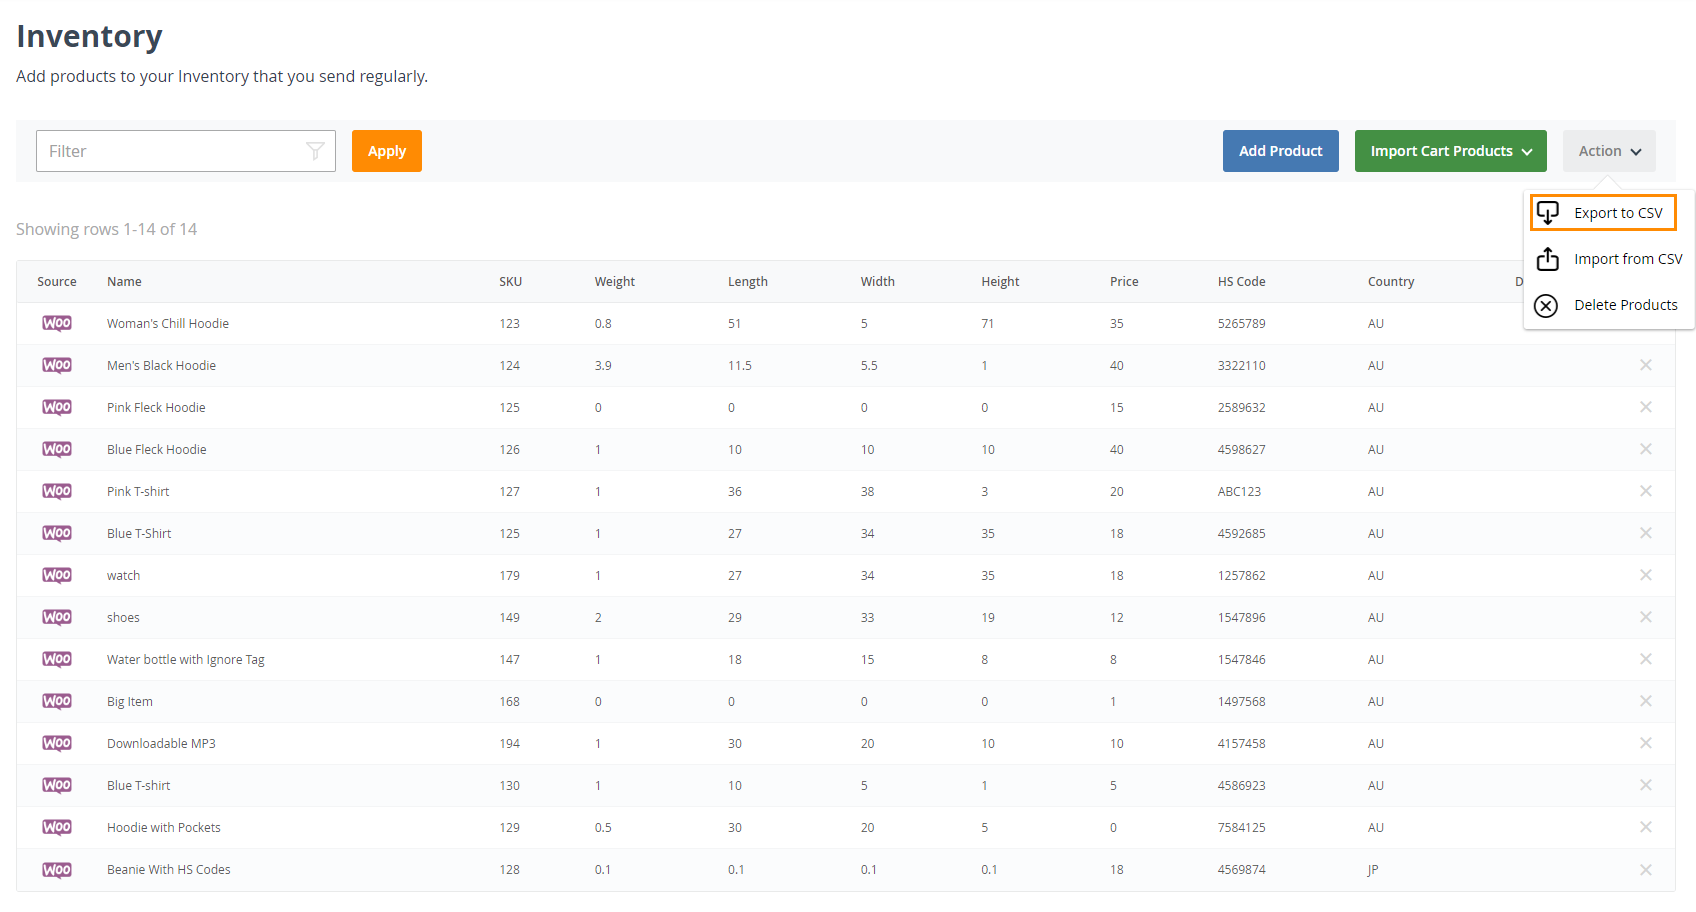
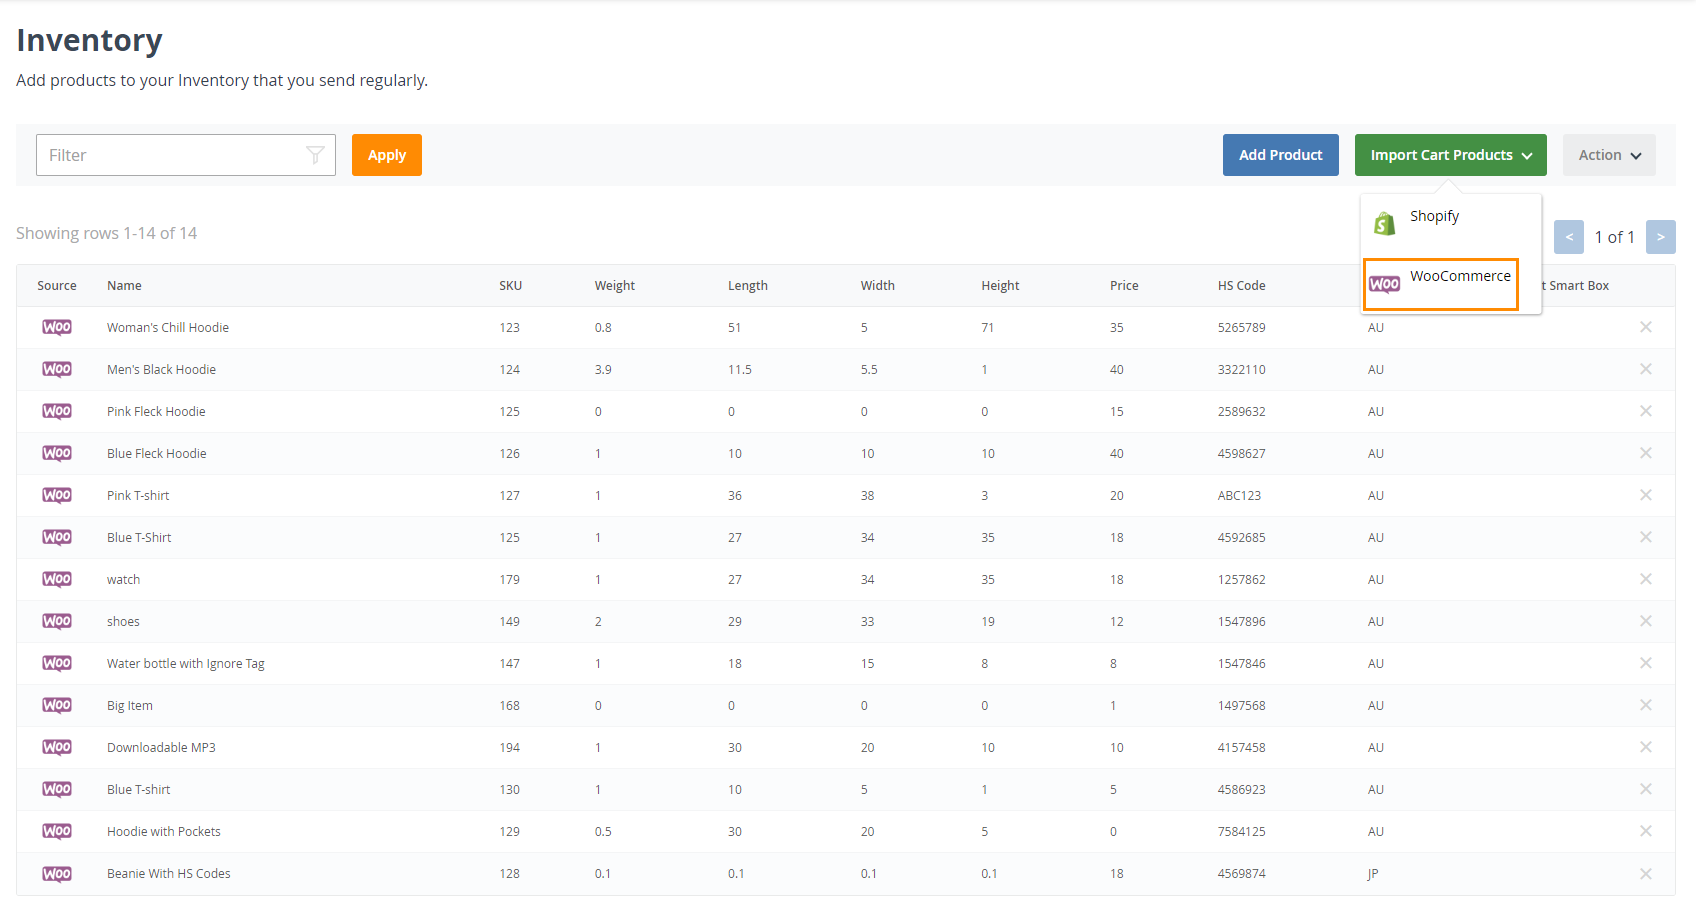
- To upload your product measurements, log in to your Interparcel Account. Hover over the Shipping Tools tab and click Inventory. Click on the Import Cart Product button and select WooCommerce to fetch your WooCommerce products into the Inventory.
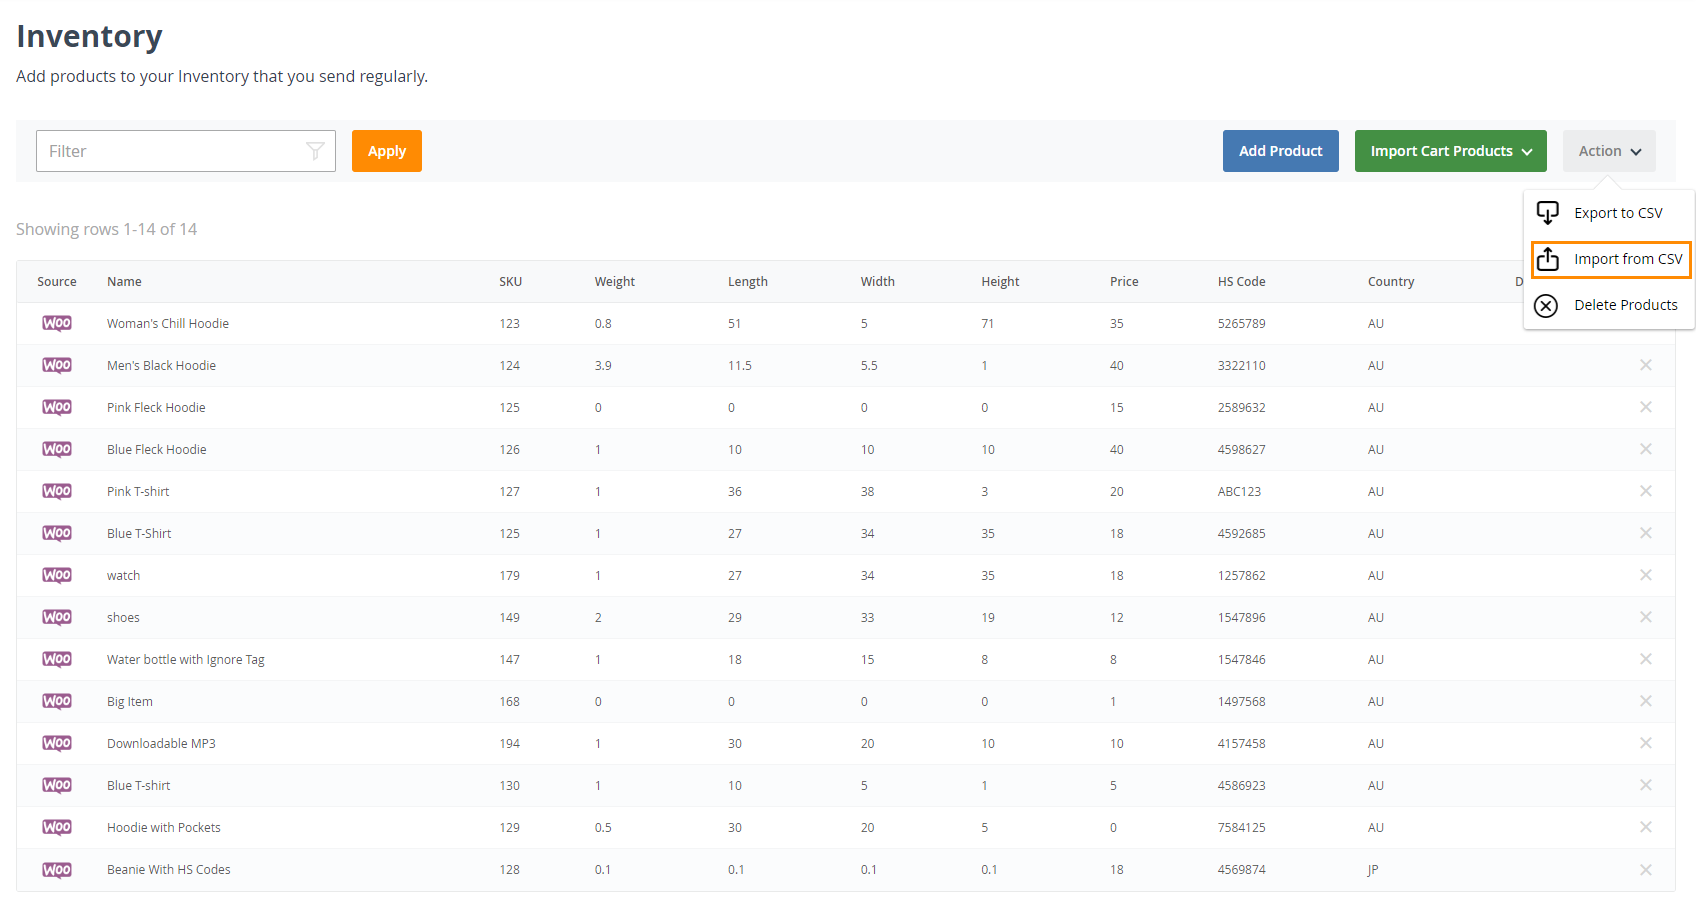
- To upload your product measurements and weight via CSV, select the Action tab and click on Export to CSV.
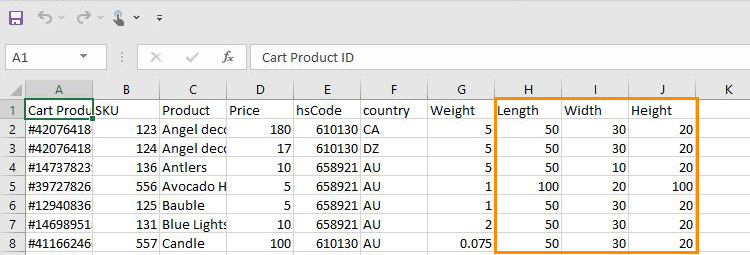
- Complete your CSV file with the product length, width and height.
- Click on Action again and Import from CSV.
- If you upload a new product on WooCommerce you will need to click the Import Cart Products button and select WooCommerce to fetch that new product in.

Step 4: Activate Cart Services
- To activate cart services, go to your Interparcel account, hover over the Shipping Tools tab, select eCom Platforms and click WooCommerce. Click Manage next to your WooCommerce connection.
- Select the Cart Services tab and toggle on the carriers that you would like to offer at checkout. Normally we recommend to enable between 2-5 services.
- If you enter in a display name for that courier service, this will be the service name that will appear at your checkout.
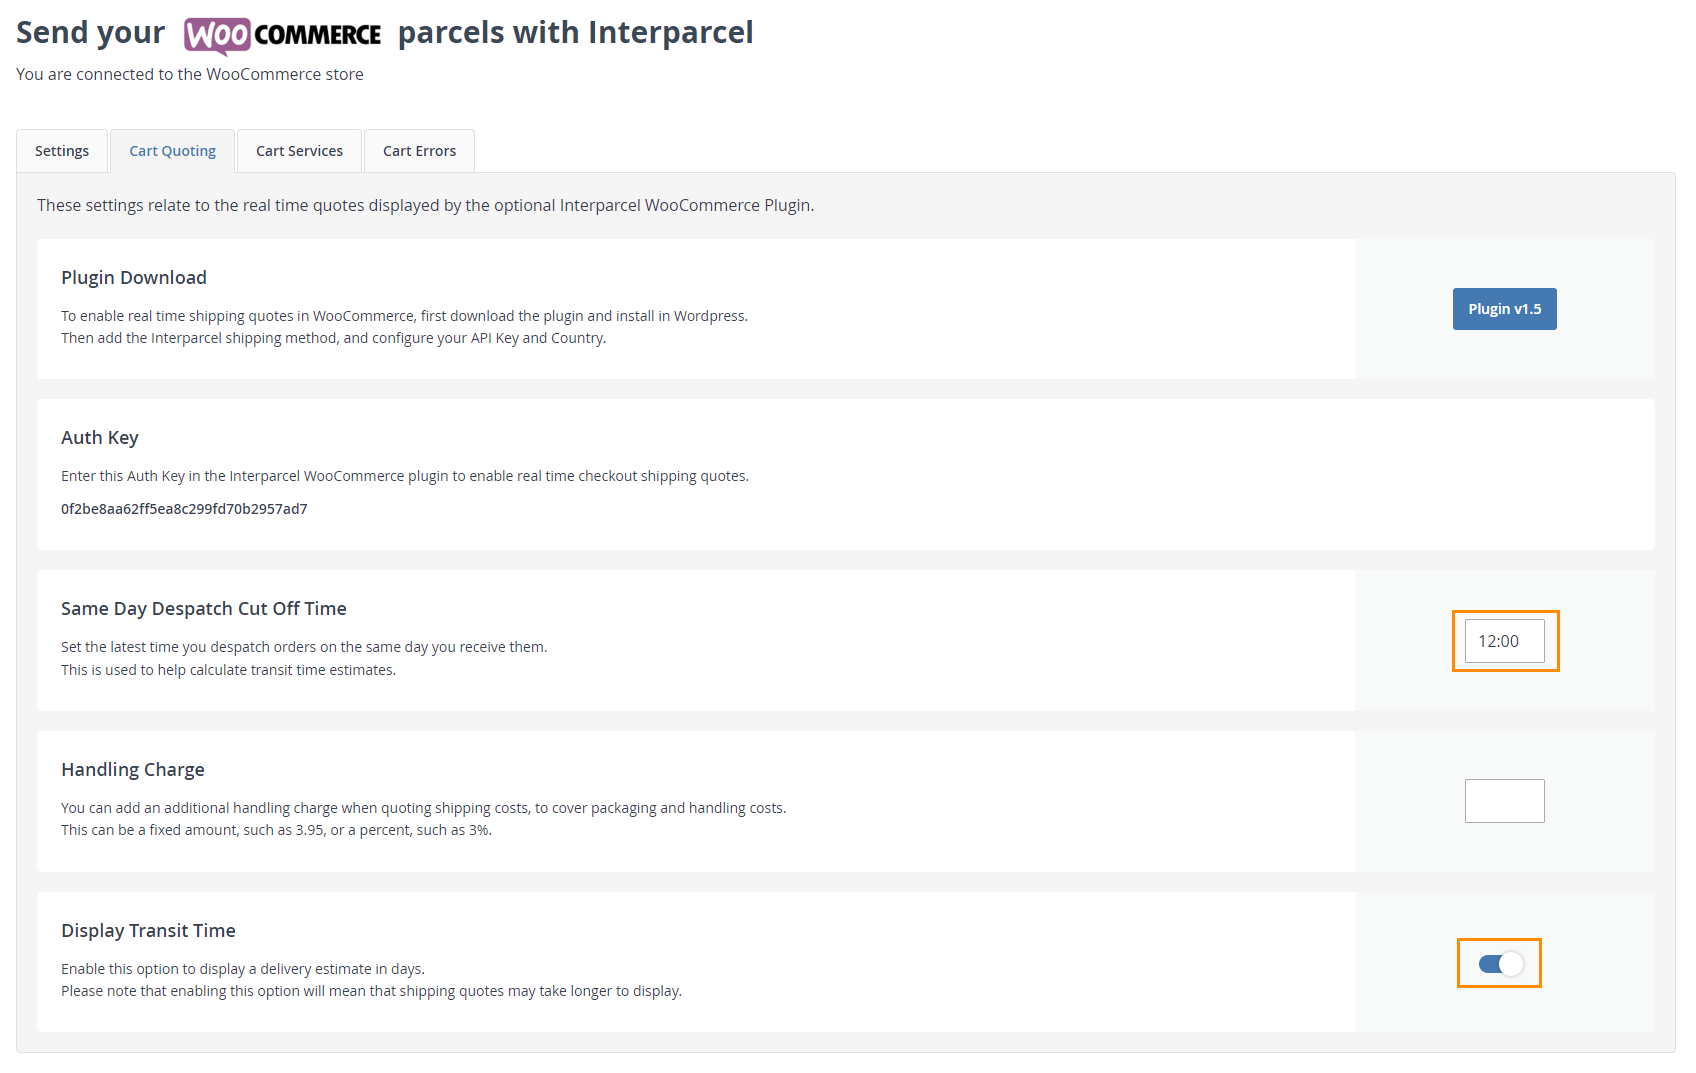
- Go to the Cart Quoting and choose the latest time you despatch orders. This time won't be shown at checkout, it's used by Interparcel to calculate the transit time estimates. This feature will work only if you enable the Display Transit Time option.
- You can also add an additional handling charge to your shipping rates to cover packaging and handling costs. This can be indicated as a fixed amount or a percentage, such as 3.95 or 3%.
- Enable the Display Transit Time option to display delivery estimated time at checkout.
- Live Quoting is now set up! You can use the Shipping Manager Guide to assist you in importing your orders into your Interparcel account and fulfilling them.


Live Shipping Rates FAQs
What are live shipping rates?
Live shipping rates are real-time shipping cost calculations presented to customers at checkout. These rates are determined based on various factors such as collection and delivery addresses, parcel weight and dimensions, and the chosen shipping service.
How can live shipping rates benefit my ecommerce business?
Offering live shipping rates can improve customer experience by providing transparency and choice of couriers, prevent overcharging or undercharging for shipping, and reducing cart abandonment rates.
Will live shipping rates show the exact cost I will pay for shipping?
Yes, live shipping rates calculate the exact cost you will pay, which helps in avoiding any additional charges after the customer completes the purchase. You can also add a handling charge, which covers packaging and handling costs. If you do this, the cost at checkout will reflect both the shipping and the handling cost.
Can offering live shipping rates provide more delivery options to my customers?
Yes, by using live shipping rates, customers can access a broader range of delivery services, from express to standard, allowing them to choose based on their budget and urgency.
How does displaying live shipping rates at checkout improve transparency?
It avoids the issue of hidden fees by showing all delivery options and costs upfront, which helps in managing customer expectations and reducing the likelihood of post-purchase dissatisfaction.
Is there a cost to enable live shipping rates on my ecommerce platform?
Enabling live shipping rates through Interparcel is free of charge for Shopify and WooCommerce platforms, with no extra fees or subscriptions required.
Didn't Find What You're Looking For?
If you have any questions or concerns regarding your integration or questions about how to send your order simply email us at shippingtools@interparcel.com.au, and we'll provide the assistance you need.
