Shipping Tools Settings
Our Shipping Tools are designed to remove repetitive tasks, reduce manual decision-making, and help you ship faster with fewer clicks.
This guide walks you through the Shipping Tools settings page so you can customise how orders behave when they land in your Shipping Manager.
To manage the Shipping Tools settings, navigate to: Shipping Tools → Shipping Manager → Shipping Tools (on the left-hand menu under Settings).

These are the options you can manage:
- Auto Select Shipping Service: Automatically chooses the right courier service for each order based on rules you define. Ideal for reducing manual clicks and creating a consistent fulfilment flow. Follow these steps to Auto Select your Shipping Service.
- Auto Select Shipping Date: Toggle on this feature to automatically select the earliest available shipping date once a service has been chosen, helping you dispatch orders more efficiently.
- Default Delivery Telephone Number: Adds a backup phone number to orders that don’t include one. This helps avoid delivery issues caused by missing contact details. Make sure to enter it with the country code (like +61 for Australia). It will only be used if the customer hasn’t provided a phone number.
- Import One Parcel Per Order: This feature is for ecommerce store imports only. If you're importing orders from eBay, for example, you might have a lot of items sold in different orders. All going to the same customer and divded in different orders in different parcels. If you toggle on this feature, our system will group all the items sold to the same person and group it in an orders, so that you need to input the parcel dimensions or select a Parcel Presets. You can also automate this process even more with Smart Boxing. Ideal for small businesses and wholesalers that don’t use live shipping rates, and retailers selling on marketplaces.
- Import One Parcel Per Order: This setting applies to ecommerce store imports. If your connected store doesn’t have live quoting enabled and an order contains multiple items, enabling this option will combine all items into a single parcel. When this setting is off, each item will appear as its own parcel line. For even faster processing, you can use Parcel Preset. in tandem with this setting. Parcel Presets let you save commonly used parcel sizes so you can quickly apply the correct preset to an imported order, reducing manual data entry and improving accuracy.
- CSV Import: Service Matching: When preparing your CSV template to import your orders to our Shipping Manager via CSV, you can list multiple services in the Service column if you want the system to choose the cheapest option from your list. To do this, enter all the services separated by commas, for example: Couriers Please Box, Couriers Please Road, Aramex Road, Aramex Road ATL. Then, in the Service Matching setting, select Cheapest so the system automatically picks the lowest-priced valid service from your list.


How to Auto Select Shipping Service
This feature allows Shipping Manager to automatically allocate the correct courier service for every order, based on the selection logic and service list you configure. It reduces manual selection and creates a smooth, automated workflow.
Follow these steps to set it up:
- Toggle on the Auto Select Shipping Service option to activate automatic courier allocation.
- Click Settings next to the toggle.
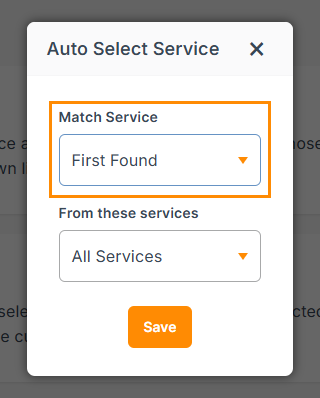
- A settings panel will open where you can control how services are chosen. In the Match Service section, select:
- First found: The system will match the first service that fits your shipment details based on your service list.
- Cheapest: The system will automatically pick the lowest priced eligible service for that shipment.
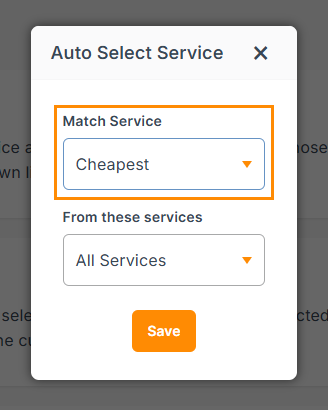
-
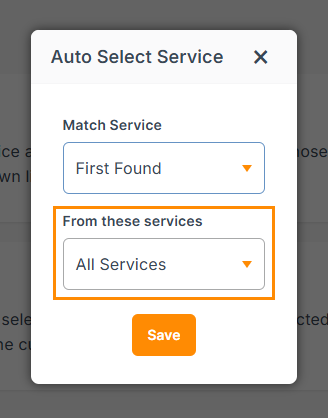
Then choose which services to use. Under the From these services drop-down, you will have two options:
- All services: The system will choose from any available services that apply to your shipment.
- Select from the list: You’ll see two boxes: All services and Selected services.
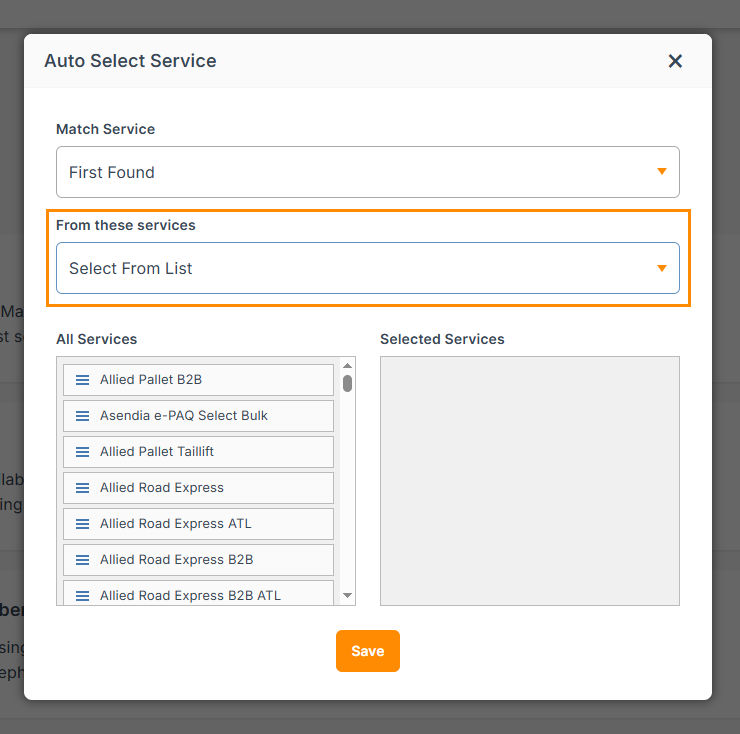
- Drag and drop the services you want to use into Selected services. Only services in the Selected services box will be considered for auto allocation.

- Once you’re happy with the selection logic and service list, click Save.


From now on, when you create shipments, the system will auto select a courier service based on the rules you’ve set here.
Other Relevant Guides
- Send Your Orders Via our Shipping Manager
- Create Automation Rules: Rule Examples
- Activate Smart Boxing
Didn't Find What You're Looking For?
If you have any questions or concerns regarding your integration or how to send your orders, simply email us at shippingtools@interparcel.com.au, and we'll provide the assistance you need.